Sunday, May 1, 2011

Doggie Diaries

As promised, here is a scan of my latest Priority Quilt for the Alzheimer's Art Quilt Initiative. It's called Doggie Diaries and is made from a panel that was donated to us in Houston last year.


This is the one that I stipple quilted with the feather stitch setting on my machine (I didn't realize it at the time), and as I was stitching I thought it looked a bit odd, but chalked it up to the twisted thread. Can you tell I was tired after a "working" weekend with my sisters and mom?

Here is a close-up of the quilting - the thread really does make it difficult to see the stitching well.


Anyway, I'm happy with the way it turned out, and I am sure someone will love to become its new owner. This one is #6955 on the
Quilts Waiting For Assignment page.

Mom's Priority Quilt #6885 from the previous post is now up here: F-f-f-fish.

Mary's can be seen here: Off Kilter, here: Wag Your Tail and here: Mischief Maker. Not all of the pictures are up yet, but check back - they are adorable! Alright - here's a sneak preview of Mischief Maker . . .


My last Priority Quilt, Dare to be Different, #6438 is available for sale here on the Quilts for Sale page.


Help me inch closer to reaching my $1000 promise!

Saturday, April 9, 2011

The Christening . . .

Of the new studio, of course!

The girls (my mom, sister-in-law Mary, sister Diane & I) decided to have a Priority Quilt weekend to christen my new studio space. My husband & I worked feverishly to get it close to finished in time for the gathering, and I spent a lot of time organizing and cleaning too.


This is sort of a "before" picture - before we really got into the thick of creativity and craziness . . .


This is a quilt my mom started (and finished, too!) - she wanted to do a crazy quilt, so we pulled out some crazy fabric and some of my hand dyes and started figuring out exactly how to put it together. You can see this quilt on the Quilts Waiting for Assignment page , it's #6885, the picture will be up when Diane gets to that batch of quilts to post, but the story behind it is there now.


On Monday, Diane's friend Andee (on the right, Mom on the left) joined us for the day and worked on her own creation, using some hand dyed velvet as the centerpiece. You'll have to wait a bit to see hers, as she didn't quite get finished before it was time to go. You can see Mom's finished quilt on the ironing table if you look closely - it's darling!


Here is Mary, working on her third Priority Quilt, this one will be so cute!


And finally, on Tuesday, when everyone had figured out how the machines worked and where things were in the studio, I got to work on a Priority Quilt of my own. It's not registred yet, so I don't have a number, but I will post about it soon since it is finished except for a label.

Funny tidbit about this quilt - I did some machine applique using the feather stitch, then did some tiny stippling which seemed to be going oddly, but also seemed to fit the character of the quilt. When I got all done, I realized that I had done the whole thing in free motion with the machine still set to the feather stitch! I'll try to get a picture of the quilting for you.


So here's the "after" shot, not too much mess left, but I will have to go and straighten things out a bit and put a few spools of thread away. All in all, I'd say it was a smashing success, we got lots of parts and pieces of PQ's done, and several finished to the label. Well done girls!!

Sunday, March 20, 2011

Studio - Design Wall & Ironing Station

So last week I finished the ironing station with some help from my sister-in-law, and today I put the bins inside the cubes. I think it will work out very well - it's the perfect height to work at standing, or the chairs I ordered can be raised to work sitting as well - nice if there are lots of parts and pieces to be ironed. The table is 5' long so even two people could easily use it at the same time. It's covered with duck cloth and a layer of batting so it's a nice firm, sturdy surface, and best of all, it's on wheels so I can move it wherever I want as long as there's an outlet nearby!


The bins and cubes are from ArtBin, they have many sizes and configurations of bins. I chose all these to be the same size as I have another bank of these in my cutting room that hold smaller items. Some of these bins have an insert that will accomodate thread cones so that they can be stored easily and dust free, plus I'll be able to see what I have at a glance.


The design wall got finished this weekend. It is made of homosote, which is essentially a pressed fiber product that you can pin into, and it's heat and fire resistant so that you can put an iron on it without issue, unlike many insulation products that many people use that are highly flammable. I covered it with white flannel because the homosote is gray and not very attractive.


I purchased this at Menard's, many home improvement stores carry it. It comes in a 4' x 8' sheet and is 1/2" thick (the picture shows two pieces together). I used the full 4' width, and had to trim each piece to 74" high because my ceilings are low in my studio. Now I have a couple of left over pieces that I could cover and use if I need a smaller surface. The beam made the perfect place to hide the light fixture that shines directly on the wall.

My wonderful husband is working on some trim as I write this, so the progress continues!

Sunday, March 13, 2011

My Longarm Experience

I had the opportunity recently to take a beginning longarm quilting class at The Quilting Connection in Elkhorn, Wisconsin with Sue Schmieden. It was a really fun day and we created two quilts that will be donated to a local homeless shelter and I learned a lot about longarm quilting, using Sue's amazingly clever Quick Zip System which allows the renter to get going on the machine without all the time to pin the quilt to the frame - you just zip your quilt on and go! Sue rents time on her machines so of course, I immediately rented time for the following week to finish a quilt top that had been hanging around here for at least 10 years.


It's a churn dash block, done in batiks on black. I really like this quilt, and I like it even better now that it's quilted. It took me about 4 hours to quilt this full size quilt - I can't imagine how long it would have taken on my Bernina, but I know that it would have been MUCH more difficult and MUCH more stressful!! I really enjoyed the whole experience and I am certainly going to do it again!


You can kind of see the pattern I chose, it's called "Paint Splat" (or something like that) and it was really fun to do and looks nice with all the straight lines in the quilt. I chose a bright pink thread to show off the quilting (how brave!) and it really works. The binding is a fun stripey batik - I'll post a picture when I finish hand sewing it to the back of the quilt. I think I'm going to hang this down in my new studio - it really needs some quilts on the walls!!

Monday, March 7, 2011

Renovation Progress


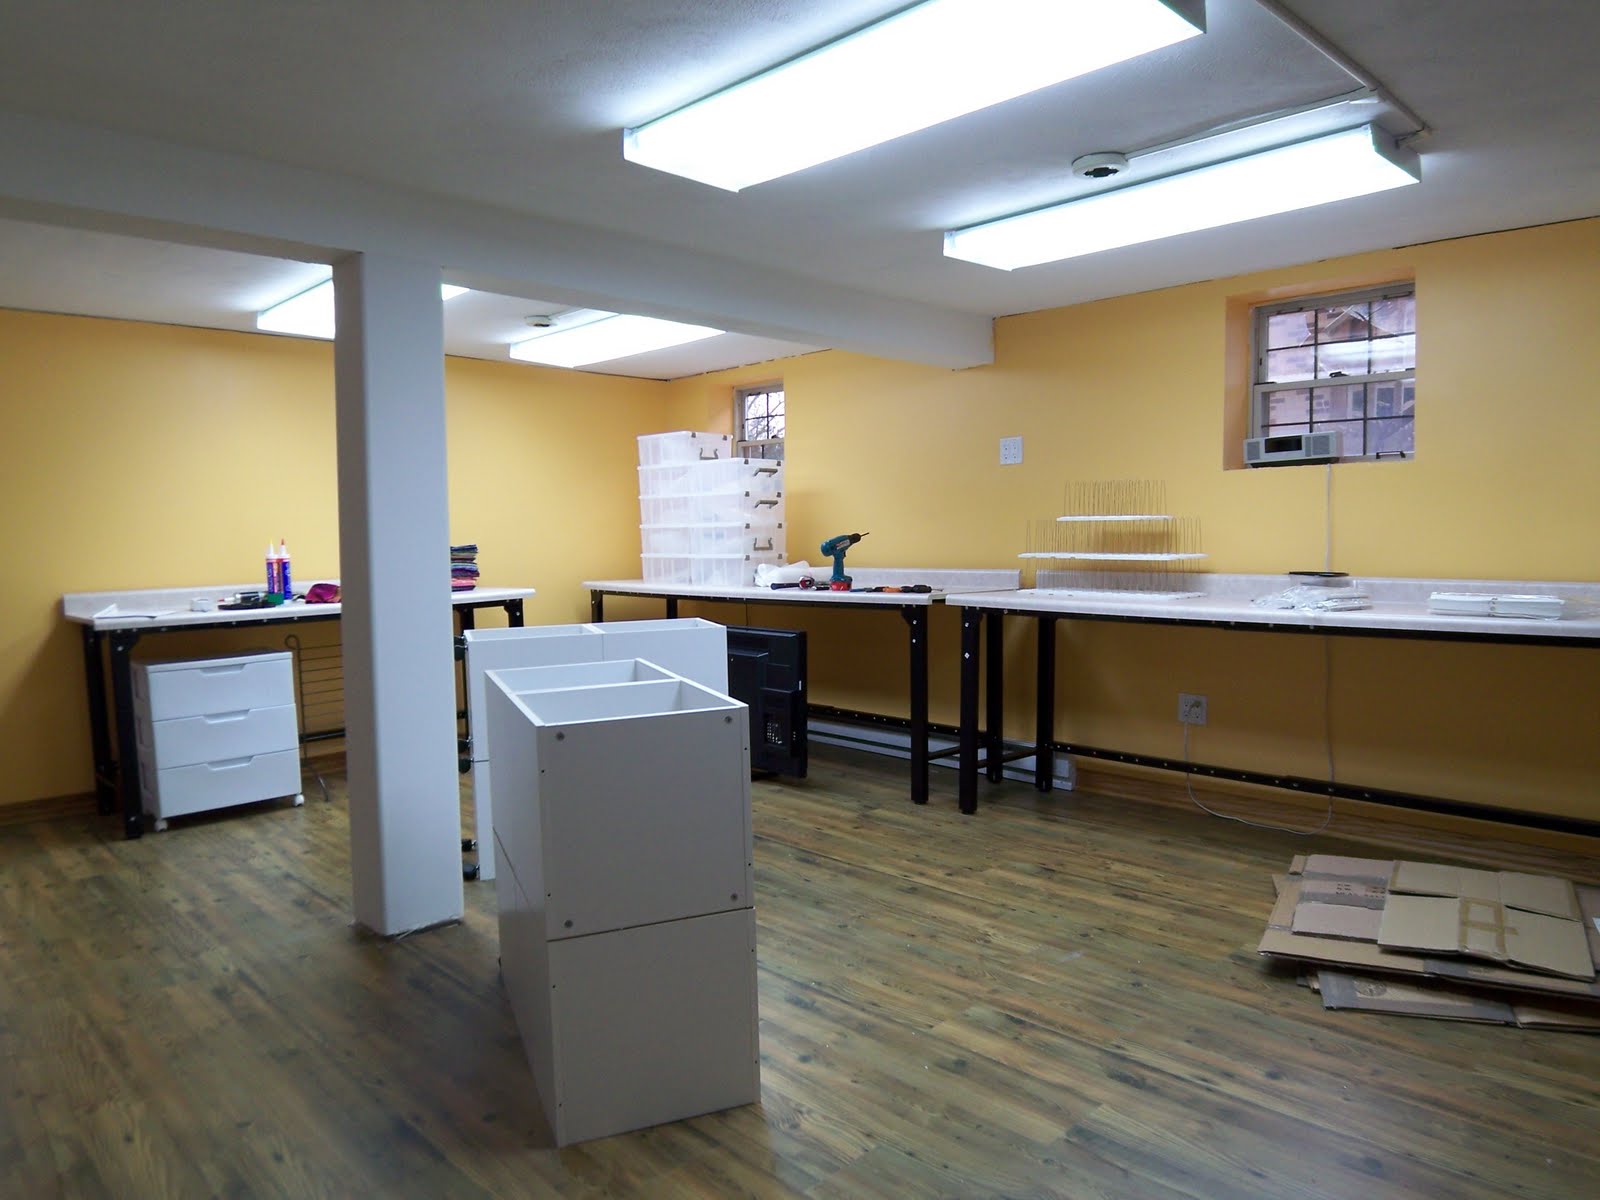
I can't believe it, but it's been a full 6 months since I started my (simple) studio renovation. Things got stalled and so much has happened since I started this process! I think the biggest hurdle was finding the right work surfaces for the space. We talked so much about building tables, buying tables, but never actually got around to DOING anything about it. Then fall came and went, things got really busy at work, my dad got sick and passed away, Christmas came and went and still no forward progress until this past weekend! We were at Menard's and like a lightning bolt from above, I see these bench frames! Perfect! The frames are adjustable from 5' to 8', and you just buy whatever table top you want, so I got countertop, pre-cut to one 6' and two 8' lengths (would have gotten 3 8', but they only had 2) and voila! I have tables!


The boxes that are lying down are my new ironing/storage unit. The top will be covered with a 5' long piece of wood that will be covered in batting and cotton duck, the boxes hold all those bins that are stacked on the tables to hold cones of thread and fabric and whatever else I need to store. The whole thing is on wheels which makes it very handy. I have a cutting table in an adjacent room so this will just be for ironing. The wall with the black stuff hanging on it will be covered with homosote and flannel for a design wall that I can iron directly on or pin things to - behind the beam there is a bank of florescent daylight lamps that shine directly on the wall.

Won't be long now! Stay tuned for the next installment!

Monday, January 31, 2011

One World One Heart 2011

And the winners are . . . .

SHAUNA HENRY - SHAUNA HENRY ART

and

LESLIE ANDERSON - MY LIFE AND TIMES

Congratulations to the winners, and thanks to everyone who stopped by!


UPDATE! Now that we've hit 100 comments, I will add a SECOND scarf (my choice!) to the drawing. There will be TWO lucky winners!! Way to go!

OWOH LIST OF BLOGGERS

One World One Heart is a worldwide event for bloggers only. It gives all those who blog a chance to meet and mingle and form connections with those they may not have otherwise met from all over the world. In the past 4 years this event has grown to over 1,000 participants with lasting friendships (and even one love connection) formed along the way. Think of it as a GIGANTIC open house allowing you to travel without ever leaving your home........going from blog to blog(in various countries) seeing the wonder each one has created and meeting all the fabulous people behind those blogs. As a bonus each blogger participant will offer up a "door prize or prizes"....just for dropping by, saying hello and seeing their world. It's really that easy.


My give-away is pictured below, it's a silk/rayon velvet scarf hand dyed by me. The scarf measures 48" x 10" and is soft and dreamy!


The scarf has color changes throughtout. Last year I got so many comments that I ended up giving away THREE scarves, one for every 100 comments . . . . maybe we can do the same this year!! And to top it off, I won some really great prizes last year from other bloggers.

The fine print: You MUST have an active blog. You MUST leave a comment on this blog entry - and that post has to include a way I can contact you if you win. You can leave your email or you can leave your blog address (but make sure your email or contact me info is current on your blog!).

THE END - yes, all good things must end - is on February 17th - the day the winners will be posted. So the cut off for comments on my blog will be midnight on the 16th. I'll use a random number generator to pick the winners.

Please, if you like fiber art, click to "follow" this blog and come back to visit now and then! I usually post about art and I try to give some steps for each piece I post so that you can get inspiration. There's even a tutorial about snow dyeing (we're expecting a blizzard this week!) so if you're in a snow belt, check it out!

Sunday, January 30, 2011

My Latest Priority Quilt

Finally finished another PQ for The Alzheimer's Art Quilt Initiative! This one was made up of things that were laying around on my cutting table and in my sewing room. I just walked around and grabbed what caught my eye and this is the result.


I took a piece of my hand dyed fabric and used that as the foundation, the stripes are from one fabric, and the leaves from another. I really liked the one strong red leaf - it reminded me of the "stand-out" in a crowd. Since losing my Dad to Alzheimer's related issues in December, red things catch my eye as his favorite color was red. He even had a red and white bathroom in one of their houses! This quilt is dedicated to Dad - he was always a bright spot in a crowd. This quilt was a challenge to myself to do something totally creative. It was “born” from bits and pieces of that were lying around my sewing area just begging to be used! I may have to do more things like this - it is a good way to use up odds and ends and be creative at the same time. Even the thread I used was the first spool that I touched when I went looking for thread to quilt it - I auditioned others, but this one was the ONE!